Author Archives: Elisabeth

About Elisabeth

The joyous and sometimes odd adventures of a former English teacher and her trusty sidekicks, Jared the Hottie Husband and her two Italian Greyhounds, Stinky Stevie and Bonnie Boo. Recently the adorable baby, Princess Evelyn, has joined the clan to shake things up!

Christmas Craft 2: Trees (EASY!)

Christmas Craft 2: Trees (EASY!)

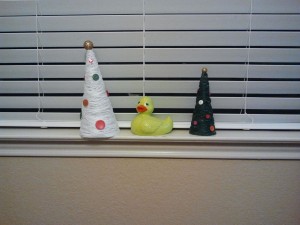
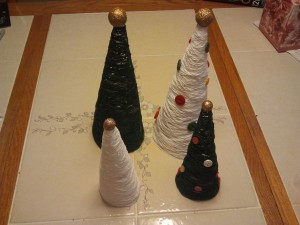
Another Pinterest goody that is super easy- making little Christmas trees with crochet thread.

You will need:

-old cereal boxes/posterboard

-plastic wrap

-crochet thread (white or green, or whatever color you want)

-Tacky or Elmer’s glue/ Starch spray

-buttons (optional)

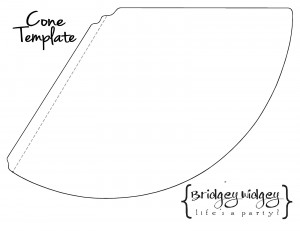
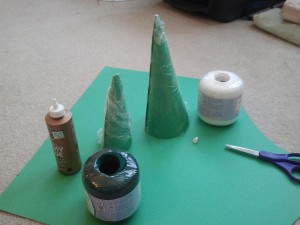
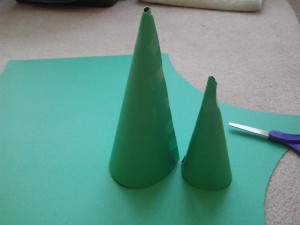
1. Make a cone or two out of the cereal box or poster board.


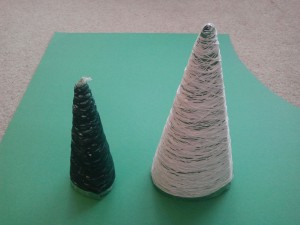
I used posterboard because it was more handy for me, and created two different sizes to mix things up a bit!

2. Cover the cones in plastic wrap. This is VERY important. Otherwise you will not find it very easy to separate the thread trees from the cones.

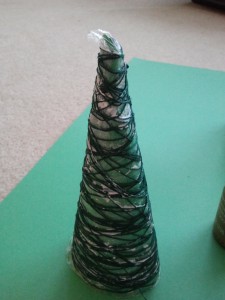
3. Wind thread around your cone!

3A. Put a little glue along the cone to help get the thread to stick while winding it around the cone. Helps things stay in place a little better

3B. Starch or Glue: I felt the glue made it a little sturdier, but that’s just me.

B1. If you use starch, you just wind and wind until you are satisfied with the amount of thread in “tree” form, then spray the whole thing down well with the starch.

B2. If you use glue, you can do it two ways. The neater, nicer way requires you to spread glue along the thread as you wind it. The more time efficient, and slightly messier way (which I did because my patience didn’t allow for the first way) is to wind it up, and then smear glue over the whole thing once you are done. You might have a few “clear” patches of where the glue dries a little thicker, but you can’t really notice it unless you are really looking. In that case, you are being too picky anyways.

4. Let the glue/starch dry on the cones. Walk away for a hour or two and do something else fun.

5. Slide the trees off the cones and carefully pull the plastic wrap off. It should come off pretty easily. If it’s proving pretty difficult to separate the thread and wrap, it’s a good possibility it needs another hour or two to dry.

6. I had some leftover small foam balls in gold from my wreath project that worked perfectly to add to the top of my trees a star. You could also use a gold button or leave it alone, if you wished. You could be done at this point, if you wished.

7. If you want to have more fun, add some buttons! Jared liked the look of a lot of buttons, so I added a few more. For a friend, I made one that was very simple with just a few buttons to keep the simple, contemporary look of the tree.

And there you have it- a simple, fun, and slightly messy Christmas craft.

ENJOY! 🙂
 

Christmas Craft: Ornament Wreath

Christmas Craft: Ornament Wreath

Ok, so this year I’ve found it hard to do many crafts or cooking. In fact, getting into “the Christmas spirit” has been a lot harder than usual. So I’ve taken some steps, particularly in the last few days, to rekindle that fire and make home more Christmassy! 🙂

The first thing I did was an idea my neighbor found on Pinterest.

(Pinterest and I have a love/hate relationship recently… I see all these creative, cute things that I would love to do, but just don’t have the time/energy/money/you-name-the-excuse to do. So then I feel like a big fat flop with all those insanely craft-gifted people out there. Then I manage to do ONE project and then 10 more crafts pop up… UGH!)

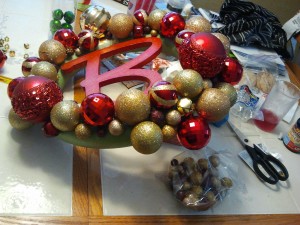
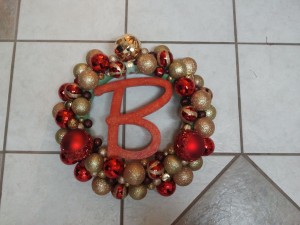
Here’s the ornament wreath we did (this one is mine, obviously).

You need:

-a foam wreath “skeleton”

-a letter of your choosing that fits the wreath (in this case, for our last name)

-a glue gun

-lots of glue for the glue gun

-ornaments

-some ribbon for looping it over the door.

(-you might also like to find some jingly bells or small foam balls in the color of your theme to glue in some of those awkward empty spots)

I got most of my ornaments from Michaels because they had the shatterproof ornaments for insanely cheap, and the rest from the dollar store. (My neighbor found some cute ones from Goodwill for her wreath, too.) I tried to get some ornaments of various sizes, too, to make my wreath look a little more interesting.

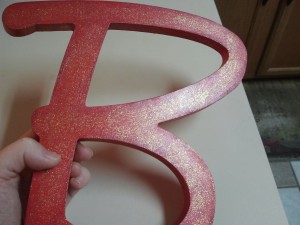
1. Figure our your color scheme: I went with a red and gold theme, and painted my letter as such:

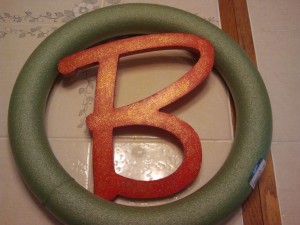
2: Then you attach the letter to your wreath with the glue gun.

Then the hard parts:

3. Figuring out how you are putting your ornaments on. I halfheartedly laid them out to see how I’d like them to look, but ended up using a lot more than I planned because I didn’t like how the sides looked. You will then need to take off the tops where you’d put ribbon or hooks to hang them on the tree.

4. Glue your ribbon in a loop where the top of your wreath will be. that way you have the place to hook it to the door taken care of and can glue ornaments over it.

5. Gluing the ornaments on took the most time. You want to try and glue them in a way to hide the tops of the ornaments. You will probably use a lot of glue to secure the ornaments, and don’t forget to hold the bigger ones for a minute so they don’t slide out of place.

Don’t forget the sides- they can be a pain to do, but it adds so much depth to your wreath if you do!! I went back and added more to cover the sides better.

Let it all try, clean up the mess (the glittery balls got glitter ALL over!)  and then hang on your door!

Tada- a fun, fully customized wreath with your name letter and color choice!

Mommy moment irony

Mommy moment irony

This afternoon I was sitting with Evelyn in my lap and was reading a book to her on our bed She was so cute I got a picture of her. I decided to send Jared a text with the picture telling him how I have the best job in the world and how I absolutely love staying home with Evie.

The next moment, she simultaneously spits up all over the bed AND has a blowout up the back of her diaper that manages to miss her dress, but gets all over my pants.

In a previous life, I would take that as a sign from the universe to not share how happy I am ever again. I would be pretty upset that I had to do more laundry and have to remake the bed.

As it was, I didn’t mind cleaning up too much.

And I still think I have the best job in the world because I love this little baby girl so incredibly much!

The Twisted Snowman

The Twisted Snowman

Okay, so between caring for a sick baby, three dogs, and myself (Jared’s well enough to go to work, so he can take care of himself), I have been slowly trying to get Christmas up around here. Jared and Sarah got the boxes down from the attic before she left on Saturday, and I didn’t want that effort to be in vain just because I was feeling under the weather. Yes. My brain does work that way sometimes. We all have our issues.

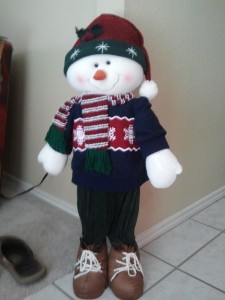
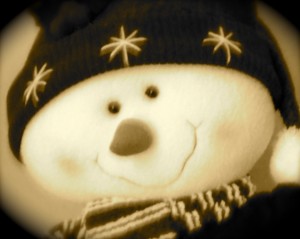
Anyways, so we have this cute little snowman guy that we got a year or two ago- I don’t remember the circumstances surrounding it- and I decided to put him by our front entry way.

The only problem is, every time I come down the stairs, or come out of the family room, I see him in my peripheral vision and nearly pee in my pants because I have no idea what a little person is doing standing inside my house! (He’s about the same size as a 3 or 4 year old kid.)

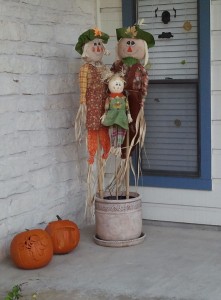
I had this same problem when we had our scarecrows out in front of the house for Halloween and Thanksgiving.

They were just perfectly placed so that when you peeked out the window, you jumped because you wanted to know who was standing there with their backs to you. *Shudder* I watched Jared put them there and it still got me every time until the week of Thanksgiving.

Now it looks so empty there…

Anyways, I guess my only consolation is that maybe, just maybe, if somebody tried to break into our house through the front door, they would be startled by this seemingly innocent snowman with a twisted smile and think twice about coming in.

Something sinister lurks beneath.