Category Archives: Creative side

One New Year’s Resolution down!

One New Year’s Resolution down!

So, one of my New Year’s resolutions was to learn how to crochet and knit. It’s one of those things I’ve wanted to do for years but never seemed to have the time to sit down and learn.  That whole being a teacher and grading papers every day thing got in the way of a lot of those kinds of resolutions. 🙂

I’ve been half-heartedly getting the hang of knitting, but it definitely takes a little longer and I need to practice more before trying to really figure out some of the patterns. But crocheting seemed more doable to me.

So, I’ve been eying this website called Craftsy because they have some fun classes for all sorts of various crafts/hobbies you might have. When Jared got me crochet hooks and knitting needles for Christmas, I took the opportunity to buy a class on sale to help me with my crocheting.

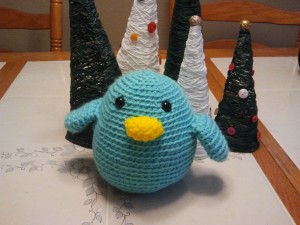
So, after a hard week’s work of learning between taking care of my little Evelyn, I have created a friend for her:

(By the way, the person behind the class/cute creations can be found on this website. She posts some of her things for free and has some great patterns and instructions for beginners like me!)

I have been so happy by how quickly I made this little bird and plan on making a few more before progressing on to the next item in the class- a bear!

Don’t worry. If I make it that far, I’ll be posting pictures. I won’t be able to help myself.

Christmas Craft 2: Trees (EASY!)

Christmas Craft 2: Trees (EASY!)

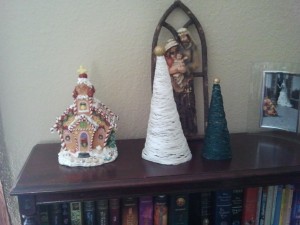
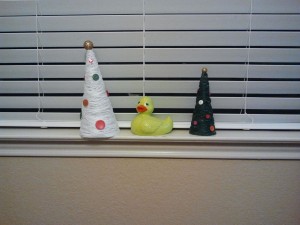
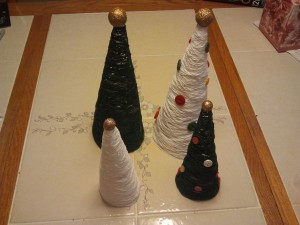
Another Pinterest goody that is super easy- making little Christmas trees with crochet thread.

You will need:

-old cereal boxes/posterboard

-plastic wrap

-crochet thread (white or green, or whatever color you want)

-Tacky or Elmer’s glue/ Starch spray

-buttons (optional)

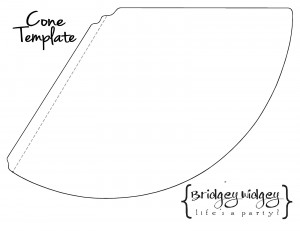
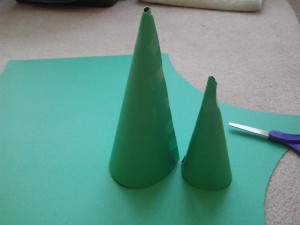
1. Make a cone or two out of the cereal box or poster board.


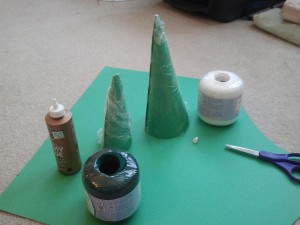
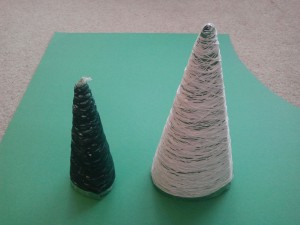
I used posterboard because it was more handy for me, and created two different sizes to mix things up a bit!

2. Cover the cones in plastic wrap. This is VERY important. Otherwise you will not find it very easy to separate the thread trees from the cones.

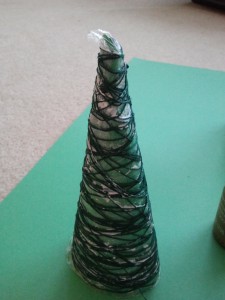
3. Wind thread around your cone!

3A. Put a little glue along the cone to help get the thread to stick while winding it around the cone. Helps things stay in place a little better

3B. Starch or Glue: I felt the glue made it a little sturdier, but that’s just me.

B1. If you use starch, you just wind and wind until you are satisfied with the amount of thread in “tree” form, then spray the whole thing down well with the starch.

B2. If you use glue, you can do it two ways. The neater, nicer way requires you to spread glue along the thread as you wind it. The more time efficient, and slightly messier way (which I did because my patience didn’t allow for the first way) is to wind it up, and then smear glue over the whole thing once you are done. You might have a few “clear” patches of where the glue dries a little thicker, but you can’t really notice it unless you are really looking. In that case, you are being too picky anyways.

4. Let the glue/starch dry on the cones. Walk away for a hour or two and do something else fun.

5. Slide the trees off the cones and carefully pull the plastic wrap off. It should come off pretty easily. If it’s proving pretty difficult to separate the thread and wrap, it’s a good possibility it needs another hour or two to dry.

6. I had some leftover small foam balls in gold from my wreath project that worked perfectly to add to the top of my trees a star. You could also use a gold button or leave it alone, if you wished. You could be done at this point, if you wished.

7. If you want to have more fun, add some buttons! Jared liked the look of a lot of buttons, so I added a few more. For a friend, I made one that was very simple with just a few buttons to keep the simple, contemporary look of the tree.

And there you have it- a simple, fun, and slightly messy Christmas craft.

ENJOY! 🙂


Christmas Craft: Ornament Wreath

Christmas Craft: Ornament Wreath

Ok, so this year I’ve found it hard to do many crafts or cooking. In fact, getting into “the Christmas spirit” has been a lot harder than usual. So I’ve taken some steps, particularly in the last few days, to rekindle that fire and make home more Christmassy! 🙂

The first thing I did was an idea my neighbor found on Pinterest.

(Pinterest and I have a love/hate relationship recently… I see all these creative, cute things that I would love to do, but just don’t have the time/energy/money/you-name-the-excuse to do. So then I feel like a big fat flop with all those insanely craft-gifted people out there. Then I manage to do ONE project and then 10 more crafts pop up… UGH!)

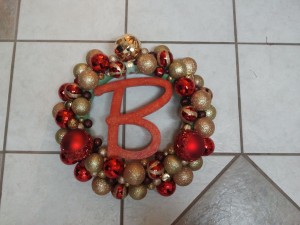
Here’s the ornament wreath we did (this one is mine, obviously).

You need:

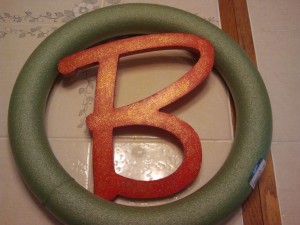
-a foam wreath “skeleton”

-a letter of your choosing that fits the wreath (in this case, for our last name)

-a glue gun

-lots of glue for the glue gun

-ornaments

-some ribbon for looping it over the door.

(-you might also like to find some jingly bells or small foam balls in the color of your theme to glue in some of those awkward empty spots)

I got most of my ornaments from Michaels because they had the shatterproof ornaments for insanely cheap, and the rest from the dollar store. (My neighbor found some cute ones from Goodwill for her wreath, too.) I tried to get some ornaments of various sizes, too, to make my wreath look a little more interesting.

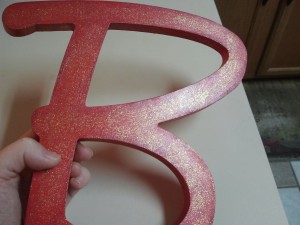
1. Figure our your color scheme: I went with a red and gold theme, and painted my letter as such:

2: Then you attach the letter to your wreath with the glue gun.

Then the hard parts:

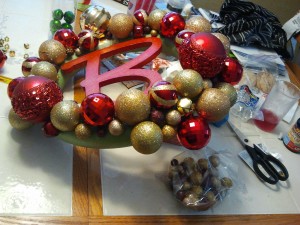
3. Figuring out how you are putting your ornaments on. I halfheartedly laid them out to see how I’d like them to look, but ended up using a lot more than I planned because I didn’t like how the sides looked. You will then need to take off the tops where you’d put ribbon or hooks to hang them on the tree.

4. Glue your ribbon in a loop where the top of your wreath will be. that way you have the place to hook it to the door taken care of and can glue ornaments over it.

5. Gluing the ornaments on took the most time. You want to try and glue them in a way to hide the tops of the ornaments. You will probably use a lot of glue to secure the ornaments, and don’t forget to hold the bigger ones for a minute so they don’t slide out of place.

Don’t forget the sides- they can be a pain to do, but it adds so much depth to your wreath if you do!! I went back and added more to cover the sides better.

Let it all try, clean up the mess (the glittery balls got glitter ALL over!)  and then hang on your door!

Tada- a fun, fully customized wreath with your name letter and color choice!

Texture Cards

Texture Cards

May has been an insane month, y’all.

There’s been so many great things that have happened this month, mixed with bittersweet ending of my last time teaching 7th grade (that I know of!). I have had some wonderful days off, Jared’s birthday, two baby showers, my mom visiting, and even a Memorial Day BBQ with good friends from church. Once summer comes, I think I’ll take some time and go back and report more on those (and definitely post more about my awesome baby shower last week, once I get some pictures from it!).

One of the neat things about expecting Baby Boothe is the new friends I am starting to make at church. Oftentimes, I just didn’t cross paths with them. They had kids to take care of, and I was working full time. There just wasn’t a lot of opportunities to seek those people out. But now Baby Boothe is in the picture, and I won’t be working full time, it’s opening up those opportunities to meet some different people and take part in different activities.

Some of these ladies decided to get together to do an activity swap. Essentially the idea is that we all make a bunch of the same kind of busy bag (or quiet activity) for our kids and then get together to swap them, and all the activities are geared for younger ages, like 3 and under. Then we meet up at somebody’s house and swap the activities, so you end up with a whole bunch of different things to do with your kids.

I made 17 sets of “Texture Cards”, a sensory activity for small children.
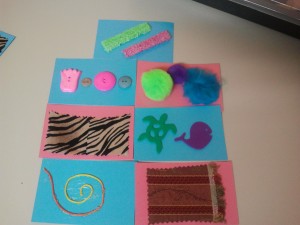
It was a lot of work, but I pretty much had all the supplies on hand (things from my classroom, like buttons and foam stickers, or things from the house like sponges and fabric.)

I chose brightly colored cardstock, pinks, blue, green, and yellow, and then laminated them and cut them into eighths. I originally started to alternate the colors of the sets (like you see in the picture above), but being the semi-perfectionist I am, I quickly started to get stressed about the logistics of that and matching up coloration (HEAVEN FORBID that you end up with pink button on a pink card!), so I ended up sticking with just one color of card per set after my practice round.
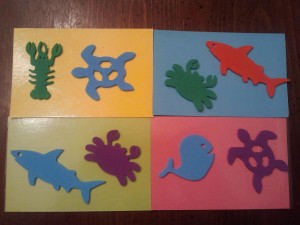
Foam sea animal themed cards… I really liked how they turned out!

Textures I tried:

1. String (difficult, not my favorite)

2. Foam sea animal stickers (easy, fun, and cute!)

3. Puff balls (I was going to use cotton balls, but saw these brightly colored ones in the grocery store and thought they would be even better!)

4. Sponges (They hadn’t been used yet, don’t worry)

5. Heavy brocade (rougher fabric)

6. Satin (They used to be a old pair of pajamas that had an unfortunate, large rip… I promise I washed them before I put them in the scrap pile. Do you really think I’d be passing dirty laundry on to other people’s kids?!)

7. Buttons (The buttons may just be my favorite part. You can find “granny grab bags” from a store like Michaels that have all sorts of random, fun buttons in them for a couple of dollars. I used these buttons for a reading/writing activity I did at the beginning of the school year with my seventh graders. If you’ve ever read “The Memory String”, it makes more sense. If you haven’t read it, you probably should.)

I was going to do rice for a “rough” texture as well, but between the laminated cards, the Elmer’s glue, and the hot glue gun, none of the combinations were coming out in a friendly-to-the-Pregnant-Elisabeth sort of way, so after a few meltdowns, Jared convinced me that with everything else going on, 7 texture cards per set would be just fine and dandy.

But think: The texture possibilities are limitless. It would be so easy to add on to these with fun ideas like netting, other sorts of stickers, foam, duct tape flaps…. etc!
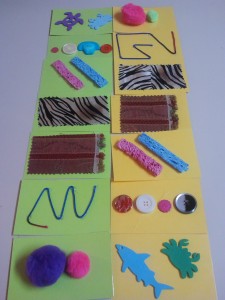
Anyways, the swap is tomorrow night. I really hope that my cards are well accepted… And I am keeping my fingers crossed that the hours of work I put into making these sets will be worth all the hard work!
There’s an app for that…

There’s an app for that…

Jared has this habit of looking at apps for my phone. (He got me the good phone first, and so he’s constantly suffering from phone envy. Here’s hoping that he gets his own awesome smart phone soon…) So, he’s been looking at all sorts of things that I can download for my phone that he wishes that he could have on his own.

The other day, he came across this app called “Paper Camera” that was Amazon’s app of the day recently. Meaning that you can download the app for free when it normally costs money. He told me that I should check it out and see if I wanted to download it to my phone. I didn’t really have time to “check it out” but it sounded intriguing, so I went ahead and downloaded it (after all, it was free, right?).

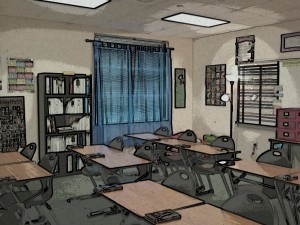
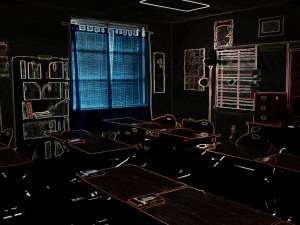
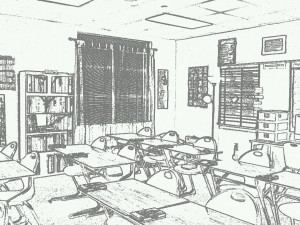
What it does is takes pictures, but instantly converts them to different styles. Case in point: My classroom.

This is Comic Book style.

Neon Cola style- takes the colors and turns it into neon-light sign style.

Going simplistic- Con Tours style.

You just select the method, and it immediately shows in real-time what the image would look like BEFORE you even take the picture. Sweet, no?

Still not sold? Just check THIS out!

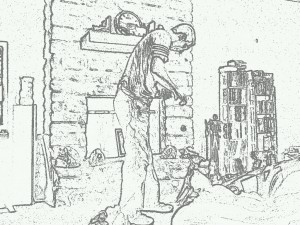
Jared and the pups in Con Tours mode.

Jared in the family room- Sketch Up style

And if that doesn’t melt your heart, what normally looks like this:


Turn into this:

Okay, now you’ve got to admit it- that’s pretty dang awesome. And the subject matter therein is pretty much the dictionary definition of adorable.