Category Archives: special events

Happy Green Day!

Happy Green Day!

Well, at least I am pretty sure St. Patrick’s Day is one of Evie’s uncle’s FAVORITE days. Right, Stephen? Yes? Oh yeah, he probably doesn’t read my blog because he’s busy being a college student. *eye roll*

And I am a fan of most things Irish. (Gotta try to talk Jared into watching “The Secret of Kells” with me again….)

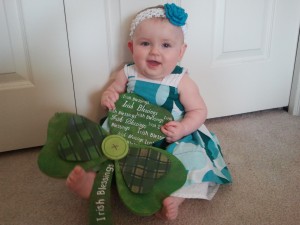
Here’s Evie wishing you all a happy day of wearing green and not getting pinched by others.

Spoiled, much?

Spoiled, much?

Evelyn’s first Christmas with us was absolutely lovely. I know she won’t remember it in the future, and she doesn’t understand what Christmas is, yet, but I still wanted it to be a great day for her and us. We weren’t disappointed!

She almost slept through the night, which was wonderful for me. When we both got sick over Thanksgiving, she went to getting up every 1-2 hours during the night again, and so we had to work on getting her to sleep in her room once she was well because I just couldn’t swing that schedule again. She’s gotten better and even slept through the night a few times, so it was overall a good night for her.

Of course, opening gifts for/with her was a blast. This little girl got SO MANY GIFTS. I would say that this almost-six month old girl owned at least 2/3 of the gifts under the tree, and most of those were from our relatives! 🙂 She doesn’t know how lucky she is to have so many people love on her like they do. I hope she does know it some day, because I am in awe of everyone’s generosity towards her.

To give you an idea, here’s Evelyn’s piles of Christmas loot she got this year:

I couldn’t get all of them into one picture very well, but I tried.

So to everyone who sent Evelyn something, THANK YOU! Everything was so adorable- I don’t think there was anything that we didn’t like. I can’t even name favorites because everything was so great! She was old enough and curious enough to want to grab at everything and play with it for a minute or two until the next toy/object came along… at one point, she was surrounded by 4-5 objects and you could tell from the look on her face that she was confused by having so many choices to play with!

Jared had a great time holding Evelyn and showing her all her gifts.

Both Jared and I were quite satisfied with all our gifts as well. He’s going to go to a car racing class in a few months, and I got a dehydrator and will be attempting to learn knitting and crocheting. (So far, so good on the knitting front! Crochet project is a little more complicated… hopefully I’ll figure that out, too!)

Even the dogs got in on the Christmas fun!

(The dogs got their pjs just in time, too! We had a cold front roll in later on Christmas day, and they were able to stay warm in the freezing temperatures.) 🙂

Once again, thank you everyone who thought of us and helped make our Christmas that much better.

I hope everyone else out there had a wonderful Christmas. Anybody get a favorite awesome gift? 🙂


6 months ago…

6 months ago…

…Evelyn came into our world and changed our lives forever (and for the better!).

I can’t believe how quickly the time has passed us by. She’s so much more enjoyable now that she can move a little bit on her own. Evie’s always been curious, but now she can do more about looking around on her own and grabbing at whatever it is that interests her. She still isn’t crazy about tummy time, but she can sit on her own and totter on her hands and knees. She LOVES to play with toys that light up and make noise.

The best part is getting her to laugh every day. If Jared and I can get a few good laughs, it always seems to make the day better, regardless of how bad a day it was before.

This sweet girl has grown so quickly (three times her birth weight by now!) and I am so grateful for the opportunity to stay home and watch her grow. Being her mom has been the best job I have ever had! 🙂

Christmas Craft 2: Trees (EASY!)

Christmas Craft 2: Trees (EASY!)

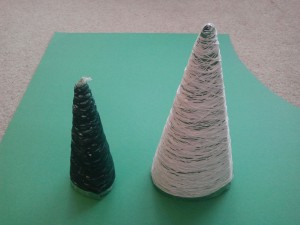
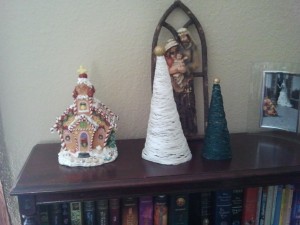
Another Pinterest goody that is super easy- making little Christmas trees with crochet thread.

You will need:

-old cereal boxes/posterboard

-plastic wrap

-crochet thread (white or green, or whatever color you want)

-Tacky or Elmer’s glue/ Starch spray

-buttons (optional)

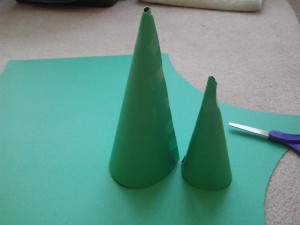
1. Make a cone or two out of the cereal box or poster board.


I used posterboard because it was more handy for me, and created two different sizes to mix things up a bit!

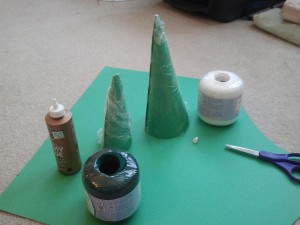
2. Cover the cones in plastic wrap. This is VERY important. Otherwise you will not find it very easy to separate the thread trees from the cones.

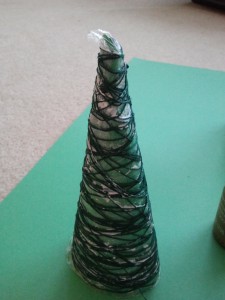
3. Wind thread around your cone!

3A. Put a little glue along the cone to help get the thread to stick while winding it around the cone. Helps things stay in place a little better

3B. Starch or Glue: I felt the glue made it a little sturdier, but that’s just me.

B1. If you use starch, you just wind and wind until you are satisfied with the amount of thread in “tree” form, then spray the whole thing down well with the starch.

B2. If you use glue, you can do it two ways. The neater, nicer way requires you to spread glue along the thread as you wind it. The more time efficient, and slightly messier way (which I did because my patience didn’t allow for the first way) is to wind it up, and then smear glue over the whole thing once you are done. You might have a few “clear” patches of where the glue dries a little thicker, but you can’t really notice it unless you are really looking. In that case, you are being too picky anyways.

4. Let the glue/starch dry on the cones. Walk away for a hour or two and do something else fun.

5. Slide the trees off the cones and carefully pull the plastic wrap off. It should come off pretty easily. If it’s proving pretty difficult to separate the thread and wrap, it’s a good possibility it needs another hour or two to dry.

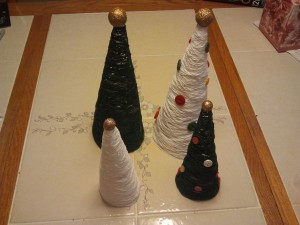
6. I had some leftover small foam balls in gold from my wreath project that worked perfectly to add to the top of my trees a star. You could also use a gold button or leave it alone, if you wished. You could be done at this point, if you wished.

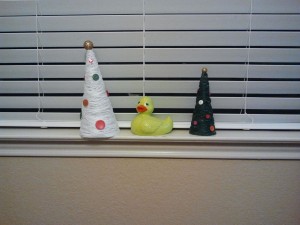
7. If you want to have more fun, add some buttons! Jared liked the look of a lot of buttons, so I added a few more. For a friend, I made one that was very simple with just a few buttons to keep the simple, contemporary look of the tree.

And there you have it- a simple, fun, and slightly messy Christmas craft.

ENJOY! 🙂


Christmas Craft: Ornament Wreath

Christmas Craft: Ornament Wreath

Ok, so this year I’ve found it hard to do many crafts or cooking. In fact, getting into “the Christmas spirit” has been a lot harder than usual. So I’ve taken some steps, particularly in the last few days, to rekindle that fire and make home more Christmassy! 🙂

The first thing I did was an idea my neighbor found on Pinterest.

(Pinterest and I have a love/hate relationship recently… I see all these creative, cute things that I would love to do, but just don’t have the time/energy/money/you-name-the-excuse to do. So then I feel like a big fat flop with all those insanely craft-gifted people out there. Then I manage to do ONE project and then 10 more crafts pop up… UGH!)

Here’s the ornament wreath we did (this one is mine, obviously).

You need:

-a foam wreath “skeleton”

-a letter of your choosing that fits the wreath (in this case, for our last name)

-a glue gun

-lots of glue for the glue gun

-ornaments

-some ribbon for looping it over the door.

(-you might also like to find some jingly bells or small foam balls in the color of your theme to glue in some of those awkward empty spots)

I got most of my ornaments from Michaels because they had the shatterproof ornaments for insanely cheap, and the rest from the dollar store. (My neighbor found some cute ones from Goodwill for her wreath, too.) I tried to get some ornaments of various sizes, too, to make my wreath look a little more interesting.

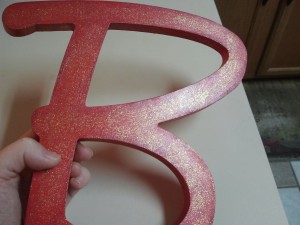
1. Figure our your color scheme: I went with a red and gold theme, and painted my letter as such:
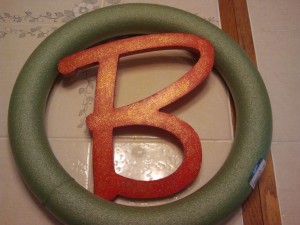
2: Then you attach the letter to your wreath with the glue gun.
Then the hard parts:

3. Figuring out how you are putting your ornaments on. I halfheartedly laid them out to see how I’d like them to look, but ended up using a lot more than I planned because I didn’t like how the sides looked. You will then need to take off the tops where you’d put ribbon or hooks to hang them on the tree.

4. Glue your ribbon in a loop where the top of your wreath will be. that way you have the place to hook it to the door taken care of and can glue ornaments over it.

5. Gluing the ornaments on took the most time. You want to try and glue them in a way to hide the tops of the ornaments. You will probably use a lot of glue to secure the ornaments, and don’t forget to hold the bigger ones for a minute so they don’t slide out of place.

Don’t forget the sides- they can be a pain to do, but it adds so much depth to your wreath if you do!! I went back and added more to cover the sides better.
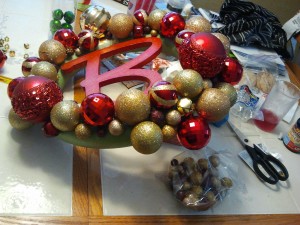
Let it all try, clean up the mess (the glittery balls got glitter ALL over!)  and then hang on your door!
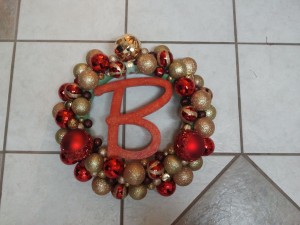
Tada- a fun, fully customized wreath with your name letter and color choice!