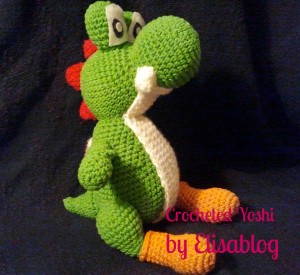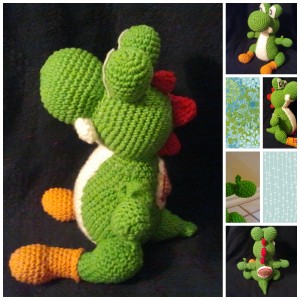
Okay, y’all. I am pretty proud of this particular crocheted cutie.
Internet, meet Yoshi!
Okay, you cannot tell me that this not-so-little guy isn’t adorable. And perfect to make for any of your Nintendo geeky friends/family members. This particular guy was made for my brother Stephen’s birthday last week. When we were kids and played MarioKart 64, we would always fight on who got to be Yoshi. When we went back to Utah in June, the old N64 got dusted off, and the battled continued.
Some things just never change.
Anyways, I had already started on this Yoshi for him by then, but it just confirmed what I already knew: Stephen was gonna love his green Yoshi!
I based this Yoshi on the free pattern you can find here. Overall, I thought the pattern was well written, though I felt it pattered out a bit at the end where I could have used a little more help with assembly!
Supplies I recommend:
- Acrylic yarn (I used mainly cotton, and didn’t love it) in
- your yoshi color (green) – about about 275 yds since you use quite a bit!
- boot color (orange),
- red (for the spikes/saddle),
- white (tummy/cheeks/saddle).
- (I also played around with the saddle and made it brown with a red stripe… because I felt like it.)
- Size G crochet hook (I used an I because I tend to be a very tight crocheter)
- White and black felt for the eyes (or just have white felt and improvise with a permanent black marker…. I may or may not have done that.)
- Tapestry needle to sew allllllllllll the parts together. (And there are lots and lots of parts.)
- Glue for gluing the felt eyes on to your Yoshi
- Polyfill
- Patience (lots of it.)
Be prepared for the assembly part-that is where patience comes in handy. It. Gets. Old. Fast. I like to assemble as I go because it makes the assembly time at the end seem not so bad. The way this pattern is written, all but the ball of Yoshi’s head are assembled at the end, and I wanted to pull my hair out because I was so sick of trying to put him together.
But when it is all said and done, you end up with this cutie! He even can give you a little thumbs up if you position his arm right!
Some things that I did that vary from the original pattern:
Legs:
(Makes two,in your Yoshi color)
Round 1: 6 sc into magic ring
Round 2: 2 sc in each st around (12)
Round 3: sc in next st, 2 sc in next st, around (18)
Round 4: sc in next 2 sts, 2 sc in next st, around (24)
Rounds 5-7: sc around (24)
Round 8: *sc in next 2 sts, dec over next 2 sts* Rep * 4 times. Sc in next 8 sts (20) ***
Round 9: *sc in next st, dec over next 2 sts* Rep * 4 times. Sc in next 8 sts (16) ***
Round 10: Dec 4 times, sc in last 8 sts (12) ***
Rounds 11-14: sc around (12)
Fasten off- no need for a tail because you will be attaching to the boots.
*** (I reversed rounds 8, 9, and 10 in the second leg- when you stuff them to put on, it creates a “mirror image” effect for those of us who are kind of perfectionists about that sort of thing)
For the saddle, I added an extra row an extra row of white single crochets since I didn’t like how small it looked on the back. If I could go back, I would have added an extra row of brown SCs, then the red slip stitches, then done the white. By this time though, I was ready to be DONE with poor Yoshi.
If you have any specific questions on what I did differently than in the original pattern, feel free to ask in the comments. I change up the saddle, the spikes, and would do the boots differently if I were to do this again any time soon! 🙂

